Fixing Spring Runoff Damage with Rock and Structural Fill and Rip Rap
When the snowpack melts and spring rains arrive, the resulting runoff can wreak havoc on rural properties. You might find new gullies…
When the snowpack melts and spring rains arrive, the resulting runoff can wreak havoc on rural properties. You might find new gullies carved into your driveway, washed-out sections of trail, or eroded stream banks on your land. The good news is, with the right materials and timely action, you can repair this spring runoff damage and even prevent it from happening again. Rock, structural fill, and riprap are your best friends in armoring the landscape against water’s force. In this article, we’ll cover common types of runoff damage and how to fix them using these rugged materials. We’ll also emphasize approaches suitable for high-elevation, snowy regions where spring runoff is an annual challenge.
Common Spring Runoff Issues
First, identify what kind of damage you’re dealing with:
- Driveway Washouts: Sections of a gravel driveway may wash downhill, leaving ruts or even impassable ditches. Culverts might plug and water flows over the drive, eroding it.
- Eroded Ditches: Drainage ditches meant to channel water might themselves erode, getting deeper and undercutting their banks.
- Gullies on Slopes: Hillsides or dirt roads can develop gullies where water concentrated and took soil with it. These can grow quickly with each rain.
- Stream/Creek Bank Erosion: If you have a creek, spring high water can eat into the banks, undermining trees or fencing.
- Pond Dam or Culvert Outlets Scour: The outflow areas where water exits a culvert or spillway can get scoured out by the high volume.
- Mudslides or Slumps: In saturated ground, small slope failures can occur, leaving a slip of soil that has moved downhill.
The fixes generally involve replacing lost soil (fill), protecting that soil with rock, and managing the water’s energy (with riprap or better drainage structures).
Materials at Your Disposal
- Structural Fill (Pit Run or Fill Dirt): This is used to rebuild volume where soil has been lost. It’s usually local pit run gravel or coarse fill dirt that can compact wel】. You use it to refill eroded ruts, gullies, or to reconstruct a washed-out section.
- Road Base Gravel (Crushed rock 3/4” minus etc.): For driveways and trails, once you fill the big hole, you need to top it with gravel that can be graded smooth and packed to drive on. Crushed roadbase with fines (like 3/4” Minus Crush, also called crush small roadbase) works perfectl】. It creates a stable running surface and resists future washouts better than just loose dirt.
- Rock (Assorted sizes): When I say “rock,” I mean medium-sized stones, from say 2 inches up to 6-8 inches. These can be applied as a surface layer in ditches or placed in small creeks to slow flow. They’re bigger than gravel but smaller than true riprap boulders. Often a mix of sizes helps lock together.
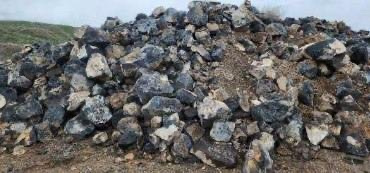
- Riprap: These are large angular rocks, typically 6 inches up to 18 inches or more, used to armor slopes and absorb high energy water flo】. Riprap is heavy and won’t move easily even in strong current, which is why it’s used on riverbanks, lake shores, and around culvert outlets. Your local pit or quarry will usually have riprap by the ton. Darby Pit offers Riprap rock for example, suitable to stabilize bank】.
- Geo-textiles: Not a “rock,” but worth mentioning – underlayment fabrics or geotextiles are often used beneath riprap or fill to keep it separated from soft soil and to add strength. If a gully is deep, laying fabric before filling can help hold the repair together, especially in wet conditions. They allow water through but keep soil in place.
- Sandbags or Earthbags: Temporary but can be filled with local sand or gravel to create a barrier or redirect flow while you work on a permanent solution.
- Concrete or Masonry (in some cases): If a culvert end broke or needs extending, you might use concrete to set it right. But that’s a larger fix – we’ll focus on rock and fill here.
Fixing a Washed-Out Driveway or Road
One of the most common repairs: part of your gravel driveway got washed out by runoff. There’s now a trench or deep ruts, and maybe the gravel got deposited further down or off to the sides.
Steps:
- Divert Water (Temporarily): Before fixing, ensure another rain won’t just undo your work. If water is still flowing, dig a small bypass channel or use sandbags to route water around the site. Or time your repair in a dry spell.
- Remove Debris and Loosen Edges: Clear any loose asphalt chunks (if it was paved), big displaced rocks, or tree debris. Cut the sides of the washout to a gentler slope if they’re vertical – this way when you fill, it interfaces better with the existing ground. Essentially, create a neat “wound” to heal, by trimming ragged edges.
- Fill in Layers: Use structural fill (coarse pit run is great for big voids) to build up the washed-out area. Dump fill, then compact. For a driveway, you can often compact by driving your tractor or truck back and forth, or using a plate compactor for tighter spots. If the washout is very deep (more than a couple feet), do it in 6-8 inch layers: fill, compact, then fill more. This ensures it won’t settle later.
- Restore Driveway Surface: Once near the original level, add your gravel topping. If you recovered some of the old gravel that washed to the side, you can reuse it, but it likely lost a lot of fines and may not bind as well. It might be best to bring in fresh roadbase gravel. Spread a generous layer (2-3 inches compacted) of 3/4” minus crushed gravel or *Crush Small Roadbase】. Crown it (slightly higher in the center) so water will shed off next time. Compact it with vehicle weight or a roller. If the area tends to get hit by water, consider using a slightly coarser gravel (like 1” minus) or even some 1-3” stones mixed in at the base for extra reinforcement.
- Improve Drainage: Figure out why that spot washed out. Do you need a culvert or cross drain to carry water under the drive? Was an existing culvert clogged? Spring is a great time to clear culverts (use a pry bar or water jet to remove debris). If water was sheeting across, maybe add a water bar (a hump to divert water off the side) above the vulnerable spot. Lining the sides of the driveway with rock or riprap in the problem area can also protect the shoulders from eroding and keep the gravel in place. For example, place a row of 4-6” rocks along the lower edge of the drive as a small barrier.
- Armoring (if needed): In extreme cases, you can actually line the surface with a grid of larger rock or pavers. But generally, a well-compacted road base will hold if drainage is fixed.
Note: After repair, drive slowly over it for a while. Fresh fill needs time to fully firm up. Maybe restrict heavy trucks if possible until a few weeks of dry weather have consolidated it further.
Repairing Eroded Ditches and Gullies
For a ditch that’s cut too deep or a gully on a slope:
- Clean and Shape: Remove any loose soil and try to grade the gully sides not too steep (ideally 2:1 slope or gentler). For a ditch, dig out any soft mud to reach a firm base.
- Line with Fabric (optional): Especially if the soil is silty or sandy. Roll out a layer of geotextile along the gully, up the sides a bit. This will keep your rock from just sinking into mud and disappearing.
- Backfill with Structural Fill: If the gully is not meant to be a water channel (i.e., you want to eliminate it completely), fill it in layers, compacting as you go. If it is a ditch that should stay but just got too deep, you might partially fill it to reestablish the right grade. In either case, standard fill dirt or pit run will do. For a large gully, you can even throw in some bigger rocks in the middle as you fill – they act like anchors.
- Add Rock/Riprap: To ensure the water doesn’t carve it out again, armor the surface. In a ditch: place a layer of rocks. For moderate flow, 3-6” cobbles could suffice. For high flow, go with true riprap (12” and up】. The rocks should ideally make a contiguous layer where you can’t easily see soil gaps between them. Think of creating a rocky creek bed so that next time water flows, it runs over and among the rocks, not touching much bare soil. In a gully repair that you filled completely, you might still lay riprap over the formerly eroded path to discourage water from re-forming it – essentially like giving that path an armor so even if water goes there, it can’t dig.
- Check Dam Technique: In a long ditch, you can place rock “check dams” – small mounds of riprap across the ditch that slow the water down. They act like speed bumps for water, reducing its erosive power downstream. Typically, a check dam is a triangle of rocks maybe 1-2 feet high that the water will pool a bit behind and then overtop gently. Place every 20-30 feet on a steep ditch.
- Vegetate or Cover Exposed Soil: Any soil still visible on the sides of the ditch or banks of the gully should be seeded and mulched so roots can help hold it. Use a hardy grass or erosion control seed mix. Spring is perfect for this – things will sprout quickly. You can also lay erosion control blankets on the sides for extra protection until plants take hold.
Stabilizing Stream Banks with Riprap
If part of your creek bank has collapsed or eroded:
- Rebuild the Bank: If a lot of bank is gone, you may need to push fill or large rocks into the void to recreate the shape of the bank. Work at low flow if possible (late spring when snowmelt is past peak). Sometimes people use machines to place large rocks at the base and then backfill soil behind.
- Lay Filter Fabric: Along the bank slope, from just below typical waterline up to above high water mark.
- Install Riprap Layer: Place large angular stones on the fabric, covering the bank. Ideally, rocks should interlock and be at least 6-8 inches thick as a layer (often much more for big rivers). Make sure the toe (bottom) of the riprap is tucked in below the streambed level so water can’t undercut it. For small creeks, 6-12” riprap might do; for larger ones, 18” rock or even bigger may be needed.
- Integrate Vegetation: Between the rocks, you can stick live cuttings of willow or other water-loving shrubs (live staking). They’ll grow roots around the rocks and further secure the bank in the long term. This combination of riprap and vegetation is often called “riparian bioengineering” – it’s effective and looks nicer over time as the plants grow.
- Upstream/Downstream Transitions: Blend the riprap into the existing bank so there’s no sudden edge where water can pry behind it. Overlap new rock with existing stable sections.
Using riprap is heavy work, often requiring an excavator to place big pieces. But it’s one of the best solutions to halt bank erosion promptly. Without it, planting alone might get washed out before roots establish.
Culvert and Outlet Repairs
Culverts often get battered by runoff:
- Unclog and Assess: Clear any debris. If the inlet is damaged (like crushed), it might need replacement or at least a steel sleeve to brace it. Spring is when you find out if they worked or not; often, adding a rock “apron” at the inlet and outlet helps for next time.
- Outlet Scour Hole: Often, fast water exiting a culvert creates a scour hole. The fix is to fill that hole with large rock – basically making a plunge pool of riprap so that the water loses energy there but doesn’t eat deeper into soil. So, fill the scour with rocks up to level with the culvert end. Also line the channel after the culvert with rock for a few yards.
- Broken Culvert Ends: If a culvert end has been eroded around (water went around it and created a new channel), you need to rebuild the soil around the end and then firmly protect it. Use a mix of structural fill and concrete if necessary to rebuild the shoulder, then put riprap around the culvert end, covering the fill. In some cases, constructing a concrete headwall or end section might be warranted to ensure water is directed into and out of the culvert properly. But at minimum, pack fill and then stack large stones around the outlet like a guard.
- Ensure Slope Armor: If the culvert outlets on a slope, that slope should be fully riprapped or stepped with rock to slow the water. Water shooting out of a pipe can really dig into an unprotected hill.
Slope Failures (Landslides)
Small slides can often be managed with rock and fill:
- Remove Unstable Material: Dig out the loose, slumped soil until you reach firm ground.
- Terrace or Bench: Create a small stepped shelf (bench) at the bottom of the slide area to place material.
- Rebuild with Fill and Rock: Fill the slip area with well-compacted structural fill. If the slope is steep, consider building a low retaining structure: for example, a row of large rocks (or a few layers) at the toe to hold the rest. This is essentially building a riprap retaining wall. Alternatively, use timbers or gabion baskets filled with rock as a retaining structure, then backfill behind them.
- Regrade Slope Gentler: If you can, make the repaired slope a bit less steep than it was. Sometimes extending the toe outward (with rock fill) gives you the base to do that. Other times, you might shave a bit off the top if possible.
- Plant and Protect: As always, get roots in there. Use erosion blankets on the new slope, plant fast-growing native shrubs or spread a erosion control seed mix. The rock at the base will shield the toe from runoff undercutting it again.
Prevention Tips for Next Spring
As you fix damage, think about prevention:
- If a certain spot floods each spring, could you install a larger culvert or an overflow channel?
- Line critical drainage paths with rock now, even if not yet badly eroded – cheaper to prevent than repair.
- Build small berms or swales uphill of delicate areas to reroute water.
- Use structural fill to build up low spots around foundations or barns to keep water from pooling and causing damage.
- After spring runoff, pits often have good deals on materials (they might have stockpiles of rock from spring production). Consider ordering extra Riprap or fill to have on hand for emergency fixes if you live in a very flood-prone area.
- Regularly clean and maintain ditches and culverts each fall (pre-snow) and early spring. A clear path for water prevents 90% of runoff issues. Simple tools like a trenching shovel or a long pry bar can break ice or packed debris that might be clogging flows.
By using a combination of structural fill to rebuild the ground, rock to armor surfaces, and riprap to defend against heavy flows, you can fix most spring runoff damage and make your property more resilient. The mountains and hills will always send water your way as the seasons change; our goal is to guide that water harmlessly through our homesteads and farms without taking our soil and improvements with it.
Remember to work safely – moving large rocks and working near flowing water can be hazardous. Don’t take on more than you’re comfortable with; there are contractors specializing in erosion control if big jobs are needed. But many repairs, with some sweat and a few loads of rock, can be accomplished by determined landowners.
Spring is a time of renewal – so it’s fitting to not only renew the land by fixing what’s broken, but also to renew our defenses so that each spring, the impact lessens. With strategic use of fill and rock, you can turn your runoff war stories into a story of “water came, but everything held firm.” And then you can enjoy the best parts of spring (green grass, flowing streams, wildflowers) without the stress of erosion and washouts.