Grading Your Property: Why Spring is the Best Time to Start
If your property has drainage issues, uneven terrain, or plans for new landscaping, grading (shaping the ground’s surface) is likely on your…
If your property has drainage issues, uneven terrain, or plans for new landscaping, grading (shaping the ground’s surface) is likely on your to-do list. Grading can mean leveling high spots, filling low areas, creating slopes for drainage, or preparing an area for sod or planting. Tackling grading in the spring offers many advantages, particularly in mountainous or snowy regions that experience a pronounced spring thaw. In this article, we’ll explain the benefits of spring grading and offer tips on how to approach regrading your property. We’ll also highlight how local materials like structural fill, topsoil, and rock can be used effectively in your spring grading projects.
The Advantages of Spring Grading
1. Optimal Soil Moisture: Coming out of winter, the ground typically holds moisture from snowmelt and spring rains. This makes soil easier to work with – not too dry and dusty (which would make it hard to compact or shape), and not rock-hard. It’s the Goldilocks condition for earthmoving. When soil is slightly moist, it cuts and fills nicely and compacts well when needed. By late summer, soils can become very dry or in late fall very wet; spring often strikes a balance.
2. Easier Revegetation: After grading, you usually want to establish vegetation (grass seed on a new lawn area, for example, or natives on a regraded slope to prevent erosion). Spring is the ideal planting time. Grass seed germinates well in cool, moist conditions and has the entire growing season to establish. If you grade in spring, you can immediately seed and take advantage of spring rains to get things growing. Grading in mid-summer means you’re trying to start grass in heat (trickier, more irrigation needed), and grading in fall may not give enough time for roots to take before winter.
3. Address Winter Damage and Drainage Clues: Winter can be rough on the land. Snow plowing might pile soil in unintended places, ground can slump from freeze-thaw, and when the snow melts, you clearly see where water is flowing or pooling. In spring, those clues are fresh – you might literally see a new gulley carved by meltwater or standing water in a spot that didn’t drain. Grading right away allows you to fix these issues before they become chronic problems. Maybe you need to build up a low spot with fill or re-slope a section to divert water – doing so now prevents another year of water damage.
4. Construction Readiness: If you have summer construction plans (a new driveway, a patio, a retaining wall), spring grading sets the stage. You can rough in the site early, and then when it’s time to build, the area is already close to final shape. Many excavating contractors prefer to do major earthmoving in spring when schedules are a bit more open, and then focus on building in summer. As a homeowner, you can follow that approach in DIY fashion: do earth shaping in spring, enjoy building projects in summer.
5. Cooler Weather for Labor: Simply put, moving dirt is hard work. Spring’s mild temperatures make it more comfortable. You’re less likely to overheat when shoveling or running machinery. And if you hire help or rent equipment, you might find more availability in spring before everyone gets busy with midsummer tasks.
6. Minimize Landscape Disruption: Early spring, many plants are still dormant or just emerging. If you need to grade around trees or in garden areas, doing it before everything leafs out or blooms can reduce stress on plants and also your anxiety about damaging growing plants. You can more easily transplant or pot up perennials and small shrubs now, grade, and then replant them, than if they were in full growth. Also, the soil is more forgiving around tree roots when moist (just be cautious to not tear up roots unnecessarily).
In mountainous regions with a short summer, spring really is the window to get ahead on land shaping so that by the time peak summer arrives, you’re not knee-deep in dirt work but rather enjoying a functional yard.
Key Grading Projects Ideal for Spring
What kind of grading projects might you consider doing now?
- Improving Drainage: Create swales (shallow channels) or berms to redirect water. Perhaps carve a gentle ditch along a driveway, or grade the yard so water flows away from the house foundation (a very important detail often corrected by adding soil against the house to get a 5% slope). Spring lets you see the natural water paths and enhance them.
- Leveling for Lawn or Meadow: If you have rough terrain but envision a smoother lawn or wildflower meadow, spring is the time to fill low spots, knock down hummocks, and spread quality topsoil. By seeding in spring, you’ll have grass covering the soil by early summer, preventing erosion and giving you a nice lawn sooner.
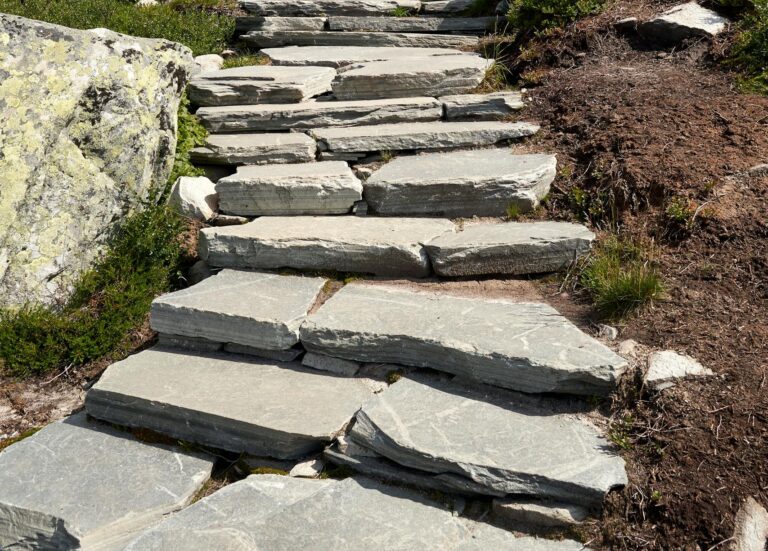
- Creating Terrace or Flat Zones: Many mountain properties are sloped. You might want to carve out a flat area for a playset, a fire pit, or a garden. That usually involves cutting into a slope and using that soil to fill a lower area (cut-and-fill). Doing that in spring gives the disturbed slope time to settle and be planted. You might use structural fill or even a small retaining wall for support – better to build that early. If you’re using heavy equipment to terrace, the soil softness in spring can actually help the machines dig (just be careful if it’s too wet; you don’t want to rut up the place).
- Driveway Regrading: Winter often leaves gravel driveways rutted or with potholes. Spring grading can re-level the surface. Adding fresh gravel (like a 3/4” Minus Crush roadbase) and grading it out now will set your driveway up for the summer. The moisture helps that new gravel compact firmly】
- Filling Erosion Gullies: If you have areas where last year’s rains or spring melt cut gullies, you’ll want to fill those. Use structural fill (like pit run) or soil and then compact and contour it to blend with the surrounding land. It’s like giving your property a bit of contour plastic surgery – smoothing scars so they heal. Spring is great because you see the scars clearly and can fix them before spring rains possibly enlarge them.
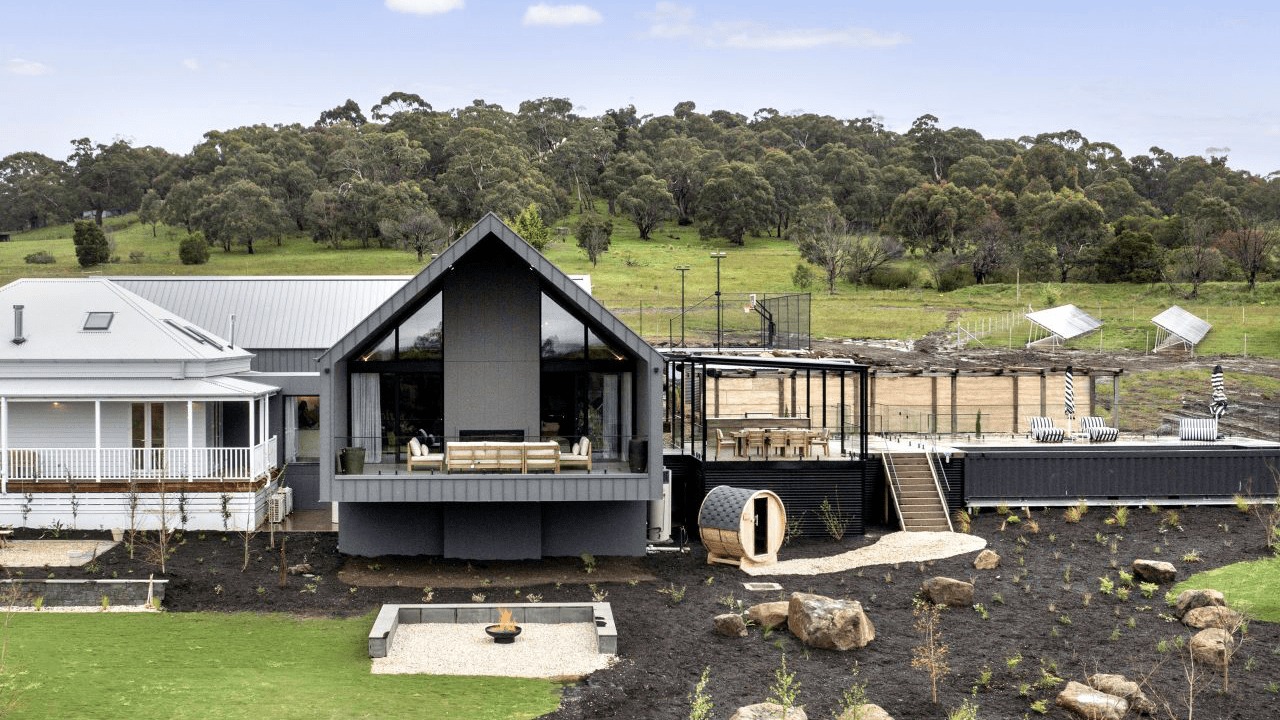
- Preparations for Paving or Hardscaping: Thinking of putting in a new gravel parking area, a concrete pad, or a paver patio come summer? Grade the area first. For example, if a parking area needs to be 6 inches lower and filled with gravel, do the excavation in spring, let the sub-base settle, then pour or lay material in summer. We covered building pads in the previous article; grading is the broader term for similar work even if a structure isn’t going there (like a patio is a “structure” of sorts requiring a level base).
How to Approach Grading
Grading can range from minor hand-work to major machine projects. Let’s cover general steps and tips:
- Plan the Outcome: Visualize or sketch how you want the land to look. Identify high spots to lower and low spots to raise. Ideally, balance cut and fill so you’re mostly redistributing soil around the site. If there’s excess, you might need to haul it off (or use it elsewhere on property). If there’s not enough to fill low areas, plan to bring in fill dirt or gravel. Many grading jobs involve bringing in some structural fill for volume and some topsoil for a top dressing. For example, if you’re grading for a lawn, you might use cheaper pit run fill to raise an area, then cap with 4-6 inches of screened topsoil for the actual lawn.
- Mark Reference Points: Pound stakes at key elevations (finished desired height) and use strings or a level to gauge how much to cut or fill. If large area, you might hire a surveyor or rent a laser level for precision, but for many yard projects a string level or builder’s level and some measuring tape suffice. Spring sunlight and lack of foliage can actually help you sight across distances easily.
- Gather Materials: Based on your plan, arrange for needed material. Local pits are waking up operations in spring, so it’s a good time to schedule a delivery of fill or topsoil before they get super busy. For instance, order a load of Structural Fill/Pit Run to build up a back yard slope, and a load of Screened Topsoil to spread on top for planting. Make sure the ground can support the dump truck delivery – sometimes early spring is muddy, so either wait until it dries enough or have them dump at the driveway where you can transfer with a smaller machine. Some areas implement road weight restrictions during early spring thaw (to protect roads), but by mid-spring these usually lift and deliveries resume normally.
- Use the Right Equipment: For small grading (flowerbeds, around a house) a shovel and rake might do. For larger jobs (resloping a yard, terracing) consider renting equipment like a skid steer (bobcat) or mini-excavator. In skilled hands, these can reshape a lot of ground quickly. Even a lawn tractor with a scraper blade can help on a modest regrade. If DIY equipment operation isn’t your thing, spring is a good time to get quotes from excavation contractors – they often have better availability before the full construction rush of summer. A day’s work by a small dozer or excavator might achieve what would take you many weekends by hand.
- Rough Grade First: Remove vegetation and topsoil from areas that will be filled (you can often reuse this topsoil later on top). Push soil from high spots toward low spots. If working on a slope, it might be cut at upper, fill at lower areas. Don’t worry about making it perfect at first – get things within say 4-6 inches of where they need to be. Remove obvious large rocks or debris.
- Incorporate Fill Material: If low spots still exist, bring in your structural fill or soil. Fill in layers and compact (just like building a pad). If you’re raising a whole area by more than a foot, do it in a couple of layers, tamping it down in between, to avoid future settling. A vibratory plate compactor or even driving a tractor/ATV back and forth can help. Spring’s moisture will help the fill settle with minimal dust.
- Establish General Slope: Ensure you have a gentle gradient where needed. For example, near a house foundation, create a slope of about 1 inch per foot slanting away for at least 6-10 feet. For large yard areas, generally ensure water will flow to desired outlets (like toward a street, into a swale, etc.). Avoid creating any enclosed depression with no outlet. Even if fairly level, have a barely noticeable slope to one side.
- Cap with Topsoil: Once the sub-grade is set with structural fill or reworked native soil, spread topsoil over areas that will be planted. A common mistake is not having enough topsoil – plants struggle in pure fill or subsoil. Aim for at least 4 inches (more is better for gardens or if budget allows). Rake it out evenly. Because spring soil is moist, you might find it clods a bit; wait for a slightly dry day to do final raking for a smoother finish.
- Final Shaping and Smoothing: Use a landscape rake or drag (pulling something flat or with mesh, like a section of chain-link fence, to smooth large areas) to get a nice even grade. Remove any remaining small rocks if it’s a lawn area. Stand at different viewpoints (including where light casts shadows across the ground) to spot any unevenness.
- Compact and Let Settle (if time): For purely decorative or lawn areas, you don’t need heavy compaction – in fact you want it a bit loose for seeding. But if you regraded a driveway or a bank, you may want to compress the soil well. You can water the area to help it settle and then add a bit more soil if it sinks. Spring rain often naturally settles graded areas. Just be vigilant that one heavy rain doesn’t wash out your work; if you can’t seed or mulch immediately, consider laying straw or erosion fabric on vulnerable slopes in the interim.
- Implement Erosion Control: If you graded any slopes steeper than say 3:1 or with loose soil, protect them. Use an erosion control blanket (a biodegradable jute or straw mat) pinned to the slope to hold soil while seeds establish. Or at least cover with straw mulch. Spring showers can otherwise carve channels in your fresh slope. Also, strategically place rocks (riprap) in any swales or outlets where water concentrates to dissipate energy. Riprap from a local source can be handy here – line the ditch or low point with some angular rocks to prevent washou】. Planting fast-growing groundcover or grass is the longer-term solution for slopes.
Local Materials for Successful Spring Grading
Leveraging local resources can make your grading more efficient:
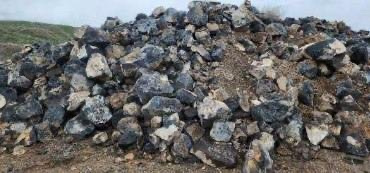
- Structural Fill/Pit Run: As mentioned, great for bulk fill. If you have a big dip in your yard, a few tons of pit run can fill it fast and cheap. Spread and then cap with topsoil for planting. Locally sourced pit run ensures compatibility with your soil and minimal surprises (it’s what your ground is made of, essentially). It’s also typically cheaper than bagged “fill dirt” or sand from far away.
- Screened Topsoil: When regrading for a lawn or garden, don’t skimp on topsoil quality. Local screened topsoil is free of large rocks and usually has decent organic matter. If your native topsoil is thin, bring some in. For example, Darby Pit’s Screened Topsoil is described as creamy and rock-free, perfect for finish grading yard】. Using local topsoil means the pH and composition likely matches well with local plant life.
- Gravel: If your grading involves any paths or driveways, using local gravel like roadbase or chips is key. After grading a driveway, top it with a few inches of 3/4” minus gravel and compact it. We have high-quality Crush Small Roadbase locally that will lock in and create a firm driving surface that last】. If you’re making a French drain or need drainage under a low spot, local Drain Rock (7/8” to 2”) or Pea Gravel can be filled in a trench to allow water to percolat】.
- Riprap and Boulders: For stabilizing newly graded slopes or creating retaining features, local rock is a must. Large angular rock (riprap) can be used to armor the base of an embankment or to build a dry creek bed for runoff. These rocks from the area will blend naturally into your landscape too. If you have access to native boulders, they make great features to break the expanse of a slope and hold soil behind them. If not, you can often purchase Landscaping Boulders by the truckload to place strategically.
- Sand: In some grading cases, you may mix sand into clay to improve drainage in the graded soil (like top-dressing an area to prevent it from getting mucky). Local reject sand (Arena Sand) is relatively inexpensive and can be tilled into heavy soil to loosen i】. Spring is a good time to do that because you can incorporate it before planting season.
Finishing Touches Post-Grading
Once the earthmoving is done and things are shaping up:
- Plant or Seed ASAP: Especially in spring, nature abhors bare soil. Weeds will find it if you don’t intentionally plant something. If it’s lawn, seed it and perhaps cover with a thin mulch of straw to keep moist and protected. If it’s a slope, consider quick-germinating cover crops (annual rye grass for example) mixed with perennial seed to quickly green it up. In flower beds, you might lay mulch right away to keep soil from crusting or eroding until you plant.
- Monitor After Rain: The first few rains are telling. Walk around and see how water flows. You might discover a small tweak needed – like, “oops, water is still pooling by that corner, maybe I need to rake a slightly deeper swale.” Spring showers give you immediate feedback. It’s much easier to adjust grade now (grass is just sprouting or area is bare) than later when everything’s established.
- Avoid Heavy Traffic on New Grades: If you regraded an area, try not to drive vehicles on it for a while (until it’s well compacted or vegetated). Spring soil is a bit softer, and a single truck tire could rut your nicely leveled lawn area. Use barriers or gentle reminders to family/contractors to steer clear of soft spots. Once grass is grown or gravel is compacted, normal use can resume.
- Layer of Finishing Material: In non-planted areas, consider a layer of crushed stone or wood chips to act as a mulch over soil. For instance, if you graded a pathway, even if you’re not hardscaping it yet, toss down some gravel so it doesn’t turn to mud. If you graded around trees, add back some of the leaf mulch or wood chips around their drip line (not piled on the trunk) to protect roots and retain moisture.
By undertaking grading in spring, you set your property up for success. Water will drain where it should, new grass will flourish on smoother terrain, and summer projects will have a prepared canvas. It’s part of the “ounce of prevention” philosophy – fix the land before problems (like water in the basement or unusable boggy spots) continue for another year.
Grading is as much art as science; you are sculpting the earth. Spring gives you a malleable medium, like clay ready to shape, and the inspirations of a new growing season to guide you. Take advantage of this timing, use the resources under your feet (and from your local pit), and you’ll create a landscape that is both functional and beautiful. By summer, when the graded areas are green and lovely, you’ll hardly remember the muddy boots and tractor treads of early spring – instead, you’ll see just the harmonious results of ground well-graded.